Introduction
Every developer eventually runs into the same problem.
You have an application running locally. Maybe it's a ReactJS frontend on port 3000, a ExpressJS backend on port 8000, a Grafana dashboard on port 3001, or a Home Assistant instance running inside your homelab.
Everything works perfectly on your machine.
Then someone asks:
"Can I take a look?"
Suddenly you're dealing with router configuration, port forwarding, firewall rules, dynamic IP addresses, SSL certificates, and security concerns.
Historically, exposing local services to the internet required opening inbound ports on your network and routing traffic directly to internal systems. While this works, it introduces complexity and risk.
This is where Cloudflare Tunnel changes the game.
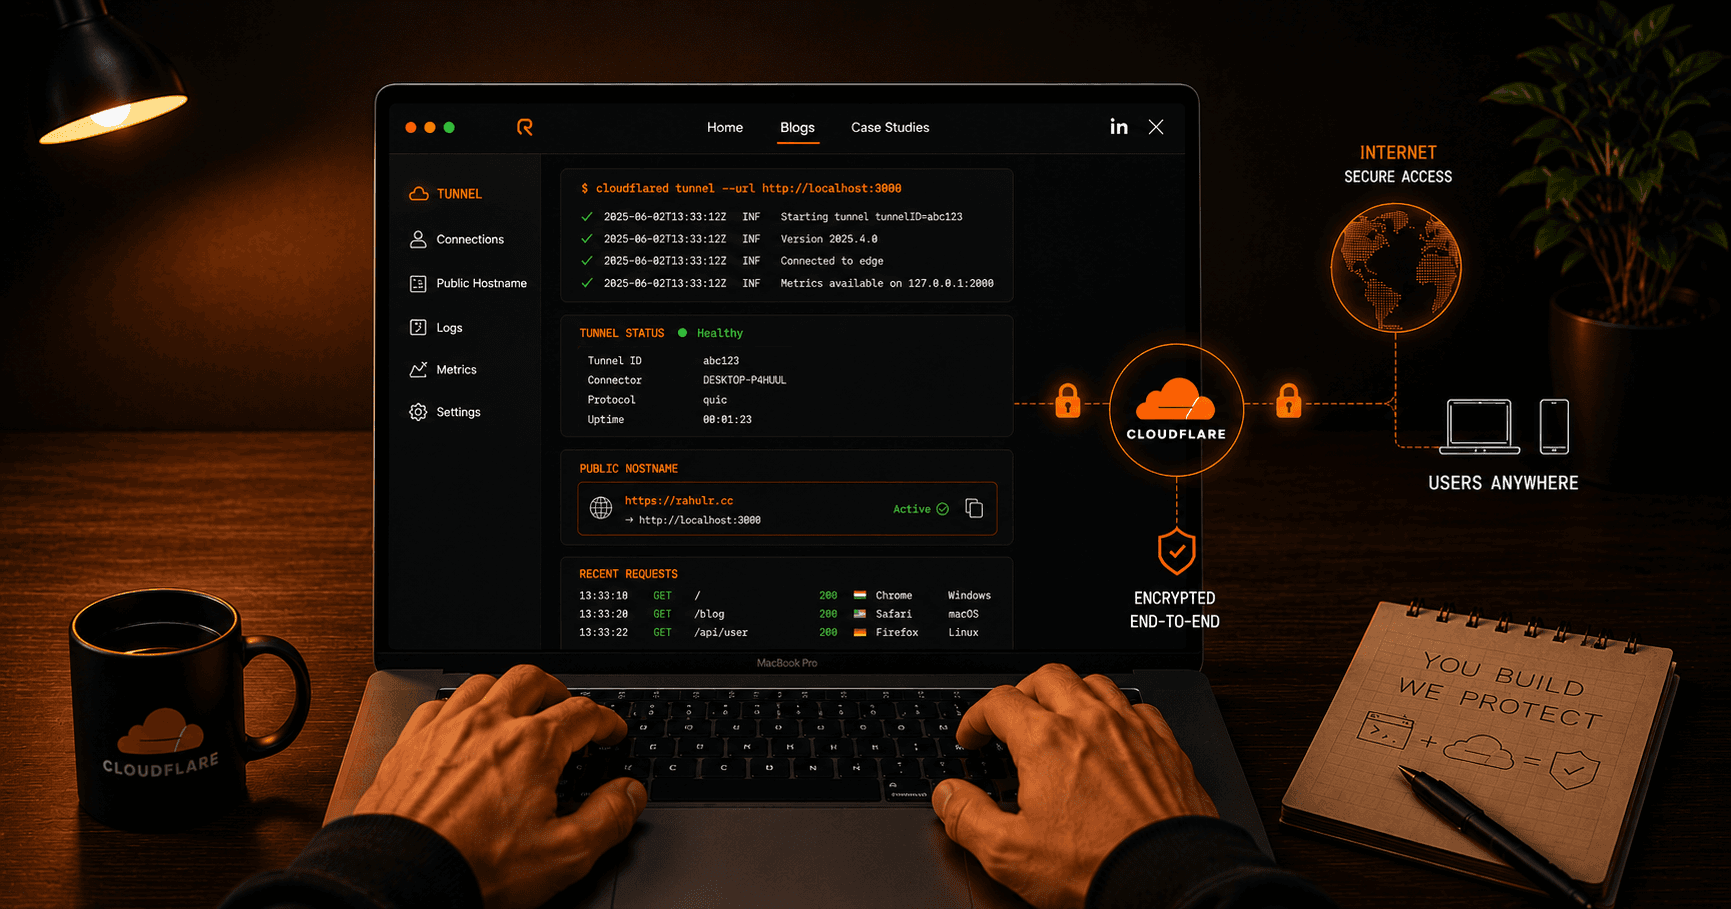
Instead of opening your network to incoming traffic, a lightweight daemon called cloudflared creates an outbound connection to Cloudflare's network. Traffic reaches Cloudflare first and is then securely forwarded through the tunnel back to your local service.
The result is:
-
No port forwarding
-
No public IP requirements
-
Automatic HTTPS
-
Better security
-
Easy access control
-
Multiple services behind a single tunnel
In this guide, we'll build a production-style setup capable of exposing multiple local applications through a single Cloudflare Tunnel.
By the end, you'll be able to access services like:
app.example.com
api.example.com
grafana.example.com
all through one tunnel connection.
Understanding Cloudflare Tunnel
Before writing commands, let's understand what's happening behind the scenes.
Traditional hosting looks like this:
Internet
   |
Router
   |
Port Forward
   |
Local Service
Cloudflare Tunnel works differently:
Internet
   |
Cloudflare Edge
   |
Encrypted Tunnel
   |
cloudflared
   |
Local Services
Notice the important difference.
Your local machine never accepts inbound internet traffic.
Instead:
-
cloudflared creates an outbound encrypted connection
-
Cloudflare maintains that connection
-
Requests travel through the existing tunnel
-
Your service responds securely
This significantly reduces attack surface.
Real-World Example
Imagine you're developing a SaaS platform.
Locally you have:
|
Service |
Port |
|---|---|
|
Frontend |
3000 |
|
API |
8080 |
|
Grafana |
3001 |
Without Cloudflare Tunnel:
-
Forward 3 ports
-
Configure reverse proxy
-
Manage certificates
-
Handle DNS manually
With Cloudflare Tunnel:
-
One tunnel
-
Three DNS records
-
Automatic HTTPS
Much simpler.
Prerequisites
You'll need:
-
Domain managed by Cloudflare ( DNS managed by Cloudflare name-servers )
- A server or VM with internet access where you will install
cloudflared
For examples we'll use:
example.com
Replace this with your actual domain.
Installing cloudflared
Ubuntu / Debian
curl -L \
https://github.com/cloudflare/cloudflared/releases/latest/download/cloudflared-linux-amd64.deb \
-o cloudflared.deb

sudo dpkg -i cloudflared.deb
Verify installation:
cloudflared --version
Example output:
cloudflared version 2025.x.x
macOS
Using Homebrew:
brew install cloudflared
Verify:
cloudflared --version
Windows
Using winget:
winget install Cloudflare.cloudflared
Verify:
cloudflared --version
Note: In future, if any of these methods aren't working you can refer to the up to date installation guide by Cloudflare
Authenticating with Cloudflare
Next we connect cloudflared to our Cloudflare account.
Run:
cloudflared tunnel login
Browser opens automatically.
Select:
Your Account
→ Your Domain
→ Authorize
Once complete, cloudflared downloads a certificate file.
Typical location:
~/.cloudflared/cert.pem
This file authorizes tunnel creation.
Creating Your First Tunnel
Create a named tunnel:
cloudflared tunnel create homelab
Output:
Created tunnel homelab
Tunnel ID:
6f5c1a90-xxxx-xxxx-xxxx
Cloudflared also generates credentials.
Example:
~/.cloudflared/6f5c1a90.json
This file identifies your tunnel.
Keep it safe.
Creating DNS Routes
Connect DNS records to the tunnel.
Frontend:
cloudflared tunnel route dns homelab app.example.com
API:
cloudflared tunnel route dns homelab api.example.com
Grafana:
cloudflared tunnel route dns homelab grafana.example.com
Cloudflare automatically creates the required DNS records.
No manual configuration needed.
Running Sample Services
Let's simulate a realistic environment.
Frontend
npm run frontend
Accessible locally:
http://localhost:3000
API
npm run api
Dashboard
npm run grafana
Now we have three applications.
Creating the Configuration File
Create:
mkdir -p ~/.cloudflared
nano ~/.cloudflared/config.yml
Add:
tunnel: 6f5c1a90-xxxx-xxxx
credentials-file: /home/user/.cloudflared/6f5c1a90.json

ingress:

  - hostname: app.example.com
    service: http://localhost:3000

  - hostname: api.example.com
    service: http://localhost:8080

  - hostname: grafana.example.com
    service: http://localhost:3001

  - service: http_status:404
Let's break this down.
Tunnel ID
tunnel: 6f5c1a90-xxxx
Specifies which tunnel cloudflared should use.
Credentials
credentials-file:
Points to the authentication file.
Ingress Rules
These are routing rules.
Think of them like Nginx virtual hosts.
Example:
- hostname: api.example.com
  service: http://localhost:8080
Translation:
When traffic arrives for api.example.com, send it to localhost:8080.
Catch-All Rule
Always end with:
- service: http_status:404
Without it, unmatched requests can behave unexpectedly.
Starting the Tunnel
Run:
cloudflared tunnel run homelab
Expected logs:
Connected to Cloudflare
Registered tunnel connection
At this point:
https://app.example.com
https://api.example.com
https://grafana.example.com
should all work.
Understanding Ingress Matching
Rules are evaluated top to bottom.
Example:
ingress:

  - hostname: app.example.com
    service: http://localhost:3000

  - hostname: "*.example.com"
    service: http://localhost:5000

  - service: http_status:404
Request:
app.example.com
matches first rule.
Request:
test.example.com
matches wildcard rule.
Order matters.
Real Homelab Example
Many self-hosters run:
grafana.example.com
prometheus.example.com
portainer.example.com
jellyfin.example.com
using a single tunnel:
ingress:

  - hostname: grafana.example.com
    service: http://localhost:3000

  - hostname: prometheus.example.com
    service: http://localhost:9090

  - hostname: portainer.example.com
    service: http://localhost:9443

  - hostname: jellyfin.example.com
    service: http://localhost:8096

  - service: http_status:404
One tunnel.
Multiple services.
No port forwarding.
Troubleshooting
Tunnel Not Starting
Validate config:
cloudflared tunnel ingress validate
Useful before every deployment.
View Logs
cloudflared tunnel run homelab --loglevel debug
Provides detailed diagnostics.
Verify DNS
dig app.example.com
Expected:
CNAME
pointing to Cloudflare's tunnel endpoint.
Check Local Service
Always verify:
curl http://localhost:3000
before blaming the tunnel.
Most issues originate from the service itself.
Running as a Service
Instead of manually launching cloudflared:
sudo cloudflared service install
Enable:
sudo systemctl enable cloudflared
Start:
sudo systemctl start cloudflared
Check status:
sudo systemctl status cloudflared
Now the tunnel survives reboots.
Conclusion
You've built a secure multi-service gateway without opening a single inbound port.
Using one Cloudflare Tunnel, we've:
-
Installed cloudflared
-
Authenticated with Cloudflare
-
Created a named tunnel
-
Added DNS routes
-
Configured multiple services
-
Implemented ingress routing
-
Enabled automatic HTTPS
-
Prepared the tunnel for production use